I use Twilio often to send automatic text messages, in this case, I was using it to send to clients with a reminder text message for their upcoming webinar. Originally I was having the text message replies give an automatic bounce back and then send me an email with the text message body. The problem with that is I wasn’t able to easily reply to these text messages. Since we already use Intercom chat on our websites I wanted to find a way to integrate replies on the SMS’s to our Intercom chat to allow us to easily respond. To do so I found a repo of someone that came up with a proof of concept how this could be done. The code had been created in 2015 so it no longer worked and lacked some functionality.
It was coded in Ruby in which I have never used until today and it was a good reason to learn it. I started with first modifying the code just to work. As it was written any incoming message would fire a webhook in Twilio that would call the Ruby app and create a new user and conversation in Intercom. When the admin replies the reply would go into a text message back to the user.
What I found orignally was each reply from the user on SMS would create a whole new thread in Intercom which made it really hard to follow. I got around this by first looking for a conversation from the user and if it existed then it would reply to that conversation instead of creating a new one. Another issue I noticed is it would send a SMS to ever user in intercom as long as they had a phone number defined. To get around this I tagged every new user with a SMS tag and that way when we responded we would only send a SMS to a user with that Tag.
I chose to run this ruby code on a Google Virtual Machine and used a ngrok tunnel to allow it to be accessible from the web over https
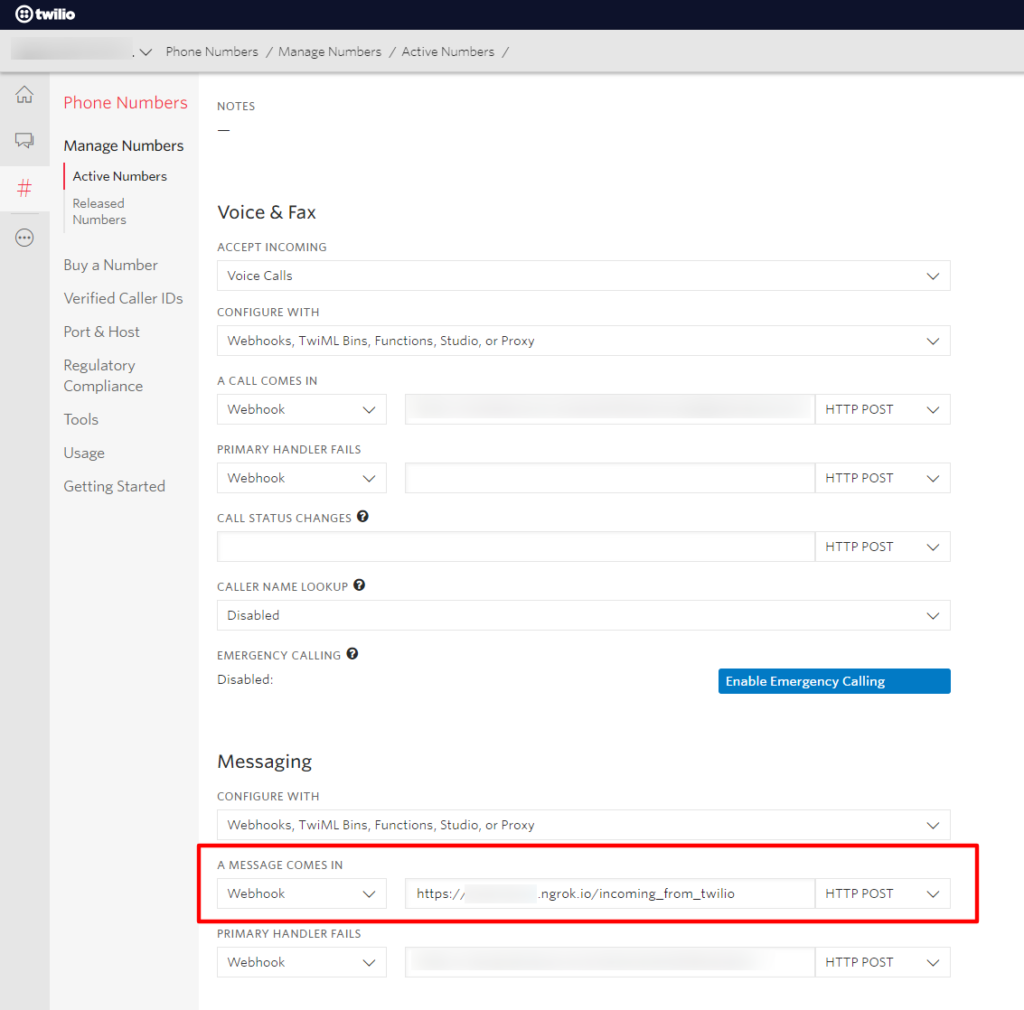
Twilio Webhook Setup:
Add your webhook into the Twilio number you want to use under the messaging tab. You can see mine in the image above
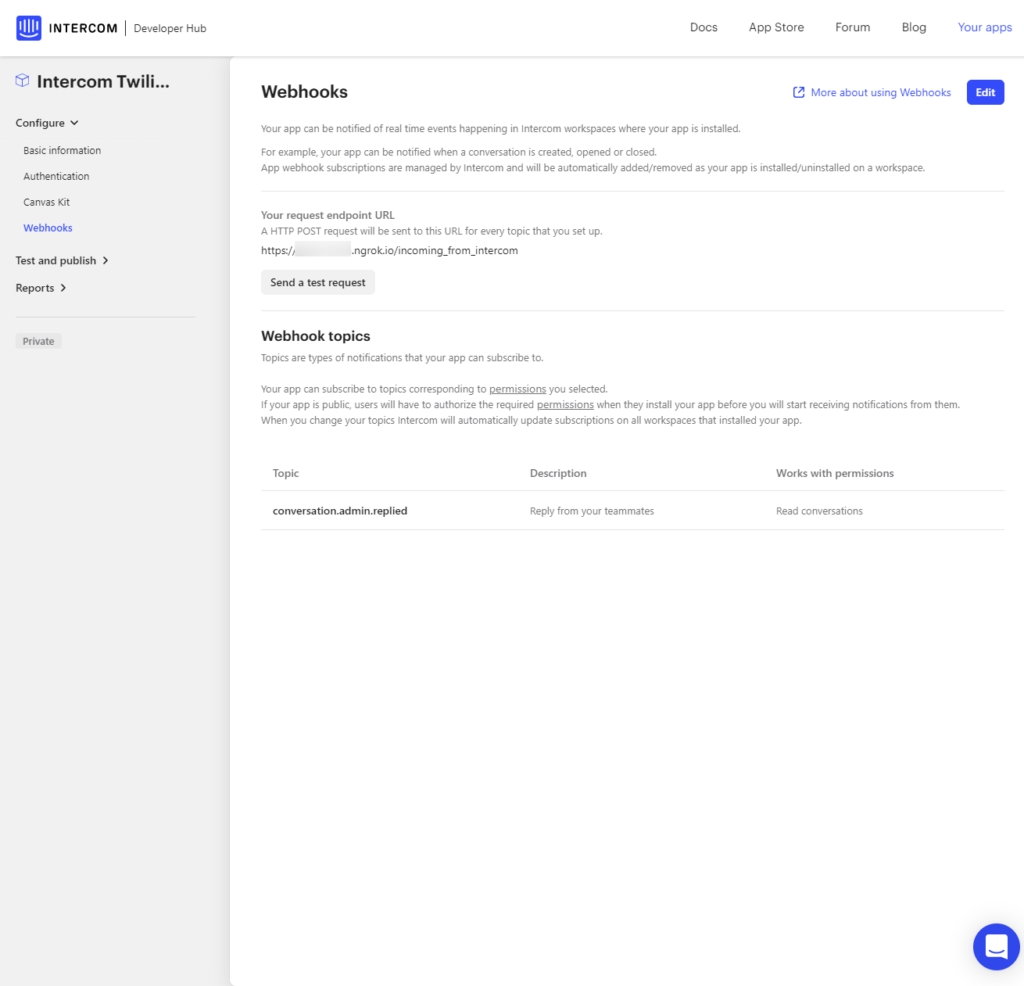
Intercom Webhook Setup:
Navigate to the Intercom Developers Hub https://developers.intercom.com/
Create a new Intercom App
Assign your Intercom App to your workspace
Grab your token from the app attached to your workplace and save it, you will need this
Create a webhook like the following
Feel free to critique my code and fork it and make any changes, as I mentioned this is the first time I have used Ruby so I am sure there is alot of best practices that were not followed and I would love to learn how I can improve this!
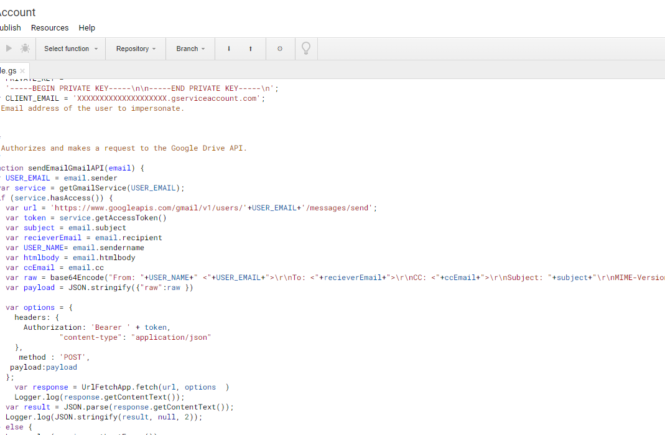
This script allows you to send emails using Google App Script and a domain-wide delegation service account so that the email can come from someone else in your organization rather than just the person who is executing the script. I found this extremely valuable when I am the one setting up automation and triggers but I want them to come from specific people other than myself.
It is required that you create a service account with the proper scopes and to put the credentials from the JSON into the script.
Download the JSON credentials to get the private key and service acccount email address to put into the script
Required Libraries:
OAuth2
Go to Resources > Libraries
Add a Library 1B7FSrk5Zi6L1rSxxTDgDEUsPzlukDsi4KGuTMorsTQHhGBzBkMun4iDF with the latest version
Click Save
Example Code:
 var email = {};
  email.subject = "Test Subject";
  email.recipient = "[email protected]";
  email.htmlbody = "Hello there, this is an example of how to send a <strong> HTML Email </strong>";
  email.sendername="";
  email.sender = "[email protected]";
  email.sendername = "Corey Jansen"
  email.cc="[email protected]";
  sendEmailGmailAPI(email);
I went to the Puerto Plata, in the Dominican Republic this month and decided to make another travel video. After my last travel video, I picked up some new gear to improve my video capturing as editing my footage from La Paz was quite difficult as most of the shots weren’t smooth. The gear I picked up was a Zhiyun Smooth Q gimbal in which allows me to take smooth video footage with my phone. A DJI Spark drone which allows me to get additional shots that you normally would not be able to get without a drone. If you have never used a DJI drone I highly recommend them. In particular, the DJI Spark has impressed me thoroughly, it is small enough to throw in your backpack while being able to take moderate winds and capture a gorgeous video and photos. In addition the app and the software on the drone was really well done and well worth the cost of the drones.
This was my first time flying the DJI Spark so I did not fly it out too far. Some of the higher and farther out group shots were taken by a friends DJI Phantom 4.
Let me know your thoughts of the video and if there is anything you think I should change for my next video.
I went on a trip to La Paz Mexico last year and had a bunch of footage from my Cell Phone and Action Cameras however having a bunch of random footage is basically useless. You or anyone else doesn’t want to sit while you scroll through random footage to find the good parts. So for Christmas this year I decided to put together all of the footage into a travel video for my parents. I have dabbled in video editing before but nothing like this.
For this project I used Adobe Premiere Pro. For anyone looking to make a travel video or undertake a larger video editing project that hasn’t previously used Adobe Premiere Pro, I highly recommend watching some tutorial videos about Adobe Premiere Pro on YouTube as they were a game changer for me. The YouTube videos taught me tricks such as organization/ hotkeys/ title sequences that really sped up the whole process of creating this video.
I have learned a lot from this whole process and what I would change next time is:
Better organization of my video files
Naming
Folder Structure
What footage to take and how to take better footage
I created this plugin to be able to make a website look localized to the location defined on a Google AdWords or Facebook Ad Campaign. The plugin is able to detect the location based on the Final URL. To Automate changing all of your Google Ads Tracking Templates take a look at this post.
To make this work you will need to define with Get Parameter the plugin will look at. For my case, it is the utm_campaign in which it looks for the city name. An example campaign name would be Brandon School Campaign. The plugin would see the city name Brandon in the get parameter and change the information to be based on that city. This will allow you to essentially have multiple targeted/localized landing pages without actually having to create a new landing page for each location by dynamically switching the information.
<?php
/*
* Plugin Name: City Customizer ShortCode
* Description: This plugin will read get parameters and echo out the correct city information. Proper use is [grabCity output="localphone"] ouput can be any of the following, localphone, address, cityname
* Version: 1.2
* Author: Corey Jansen
* Author URI: https://coreyjansen.com
*/

//DEFINE CITY NAME AND CITY INFO
$defaultCityName = "Winnipeg";
$cityInfo = array(
	array(
		"cityname" => "Winnipeg",
		"localphone" => '<a href="tel:12045555555">(204) 555-5555</a>',
		"address" => '2080 Pembina Hwy, Winnipeg Manitoba R2E 1S5'
	) ,
	array(
		"cityname" => "Brandon",
		"localphone" => '<a href="tel:12045555555">(204) 555-5555</a>',
		"address" => '2080 Pembina Hwy, Winnipeg Manitoba R2E 1S5'
	) ,
	array(
		"cityname" => "Calgary",
		"localphone" => '<a href="tel:14035555555">(403) 555-5555</a>',
		"address" => '123 Fake Street, Calgary Alberta C2E 5S5'
	)
);


//MAIN FUNCTION THAT PULLS IN ATTRIBUTES FROM SHORTCODE AND RETURNS THE INFORMATION
function citycus_mainGetInformation($atts = [], $content = null, $tag = '')
{

	// ---------- START FUNCTION TO GET WHICH DATA WE WANT TO ECHO ----------
	// NORMALIZE ATTRIBUTE KEYS, LOWERCASE

	$atts = array_change_key_case((array)$atts, CASE_LOWER);

	// OVERRIDE DEFAULT ATTRIBUTES WITH USER ATTRIBUTES

	$wporg_atts = shortcode_atts(['output' => 'city', ], $atts, $tag);
	$output = esc_html__($wporg_atts['output']);


	$campaignName = citycus_getCityName();

	return citycus_getCityInfo($campaignName, $output);
}

//FUNCTION THAT PULLS THE CITY INFO BASED ON WHAT WAS DEFINED IN THE OUTPUT PARAMETER IN THE SHORT CODE
function citycus_getCityInfo($cityName, $returnInfo)
{
	global $cityInfo;
	foreach($cityInfo as $currentCity) {
		if ($currentCity['cityname'] == $cityName) {
			return $currentCity[$returnInfo];
		}
	}
}

// GETS CITY NAME FROM COOKIE IF SET. IF NOT GETS FROM GET PARAMETER AND
// SAVES TO COOKIE SO THAT THE PARAMETER INFORMATION IS STORED ON ALL PAGES
function citycus_getCityName()
{
	$campaignName = $_GET['utm_campaign'];
	$currentCityName = citycus_returnCityName($campaignName);
	$cookie_name = "WebsiteCampaignCity";

	// Check if cookie is set

	if (isset($_COOKIE[$cookie_name])) {
		return $_COOKIE[$cookie_name];
	}
	else {
		setcookie($cookie_name, $currentCityName, time() + (86400 * 30 * 7) , "/"); // 86400 * 7 = 7 DAYS
		return $currentCityName;
	}
}

// CHECKS GET PARAMETER AND RETURNS CITY NAME WILL RETURN DEFAULT IF NOT SET
function citycus_returnCityName($campaignName)
{
	foreach($GLOBALS['cityInfo'] as $currentCity) {
		$result = citycus_checkCityName($campaignName, $currentCity['cityname']);
		if ($result) {
			return $currentCity['cityname'];
		}
	}

	return $GLOBALS['defaultCityName'];
}
//CHECKS IF CITY NAME MATCHES
function citycus_checkCityName($campaignName, $cityName)
{
	if (strpos(strtolower($campaignName), strtolower($cityName)) !== false) {
		return true;
	}
	else {
		return false;
	}
}

//INITIATES SHORTCODE FUNCTION
function wpgrabCity_shortcodes_init()
{

	add_shortcode('grabCity', 'citycus_mainGetInformation');

}

add_action('init', 'wpgrabCity_shortcodes_init');
Use the following script to change all of your Google Ads Tracking Template to include all the Campaign Name, Ad Group, Medium, MatchType, Keyword Used automatically using Google Script.
I used this script originally when I was using CallRail and wanted to automatically pull in the Keyword, Campaign Name into the CallRail Report. Instead of sitting there and changing each ad Final URL I used this script.
function  main()
{
  //{CampaignName} ---> Campaignlevel Template
  //{AdGroupName} ----> AdgroupLevel Template


// Enter your template with at least one of {CampaignName} or {AdGroupName}
  var TrackingTemplate="{lpurl}?matchtype={matchtype}&network={network}&device={device}&adposition={adposition}&keyword={keyword}&utm_source=google&utm_medium=cpc&utm_adgroup={AdGroupName}&utm_campaign={CampaignName}";  //Example

var _CAMPAIGN_CONTAINS="";               //Filter by Campaign name
var _ADGROUP_CONTAINS="";               //Filter by Adgroup name
var STATUS="ENABLED";                    //ENABLED, PAUSED


// Hit Preview to see the changes/logs.


//////////////////////////////////////////////
if(TrackingTemplate.search("{CampaignName}")>0&&TrackingTemplate.search("{AdGroupName}")==-1)
{
var TempSplit=TrackingTemplate.split("&");
for(var i in TempSplit)
{
 if(TempSplit[i].split("=").indexOf("{CampaignName}")>0)
  {var No=i;
   break;
  }
 }
var Temp=TempSplit[No].split("=");

 var campaignIterator=_CAMPAIGN_CONTAINS==""?AdWordsApp.campaigns().withCondition("Status = "+STATUS).get():AdWordsApp.campaigns().withCondition("Name contains '"+_CAMPAIGN_CONTAINS+"'").withCondition("Status = "+STATUS).get();

if(!campaignIterator.hasNext()){Logger.log("No Campaigns matched with this condition")}
while(campaignIterator.hasNext())
  {

  var campaign=campaignIterator.next();
  Temp[1]=campaign.getName();
  TempSplit.splice(No,1,Temp.join("="));
  var campaigntemplate=TempSplit.join("&");;
  campaign.urls().setTrackingTemplate(campaigntemplate);
  }

}

if(TrackingTemplate.search("{AdGroupName}")>0)
{
var CampaignCondition=false;
var TempSplit=TrackingTemplate.split("&");
for(var i in TempSplit)
{
 if(TempSplit[i].split("=").indexOf("{AdGroupName}")>0)
  {var No=i;}
  if(TempSplit[i].split("=").indexOf("{CampaignName}")>0)
  {var Cn=i;CampaignCondition=true;}
}
var Temp=TempSplit[No].split("=");

if(_ADGROUP_CONTAINS==""&&_CAMPAIGN_CONTAINS=="")
{var adgroupIterator=AdWordsApp.adGroups().withCondition("Status = "+STATUS).get();}
  else if(_ADGROUP_CONTAINS==""&&_CAMPAIGN_CONTAINS!=="")
var adgroupIterator=AdWordsApp.adGroups().withCondition("Name contains '"+_ADGROUP_CONTAINS+"'").withCondition("Status = "+STATUS).get();
 else if(_ADGROUP_CONTAINS!==""&&_CAMPAIGN_CONTAINS!=="")
var adgroupIterator=AdWordsApp.adGroups().withCondition("CampaignName contains '"+_CAMPAIGN_CONTAINS+"'").withCondition("Name contains '"+_ADGROUP_CONTAINS+"'").withCondition("Status = "+STATUS).get();
  var adgroupIterator=AdWordsApp.adGroups().withCondition("CampaignName contains '"+_CAMPAIGN_CONTAINS+"'").withCondition("Name contains '"+_ADGROUP_CONTAINS+"'").withCondition("Status = "+STATUS).get();
  if(!adgroupIterator.hasNext()){Logger.log("No Campaigns/Adgroups matched with this condition")}
  if(CampaignCondition==false){
  while(adgroupIterator.hasNext())
  {
  var adgroup=adgroupIterator.next();
  Temp[1]=adgroup.getName();
  TempSplit.splice(No,1,Temp.join("="));
  var adgrouptemplate=TempSplit.join("&");
    adgroup.urls().setTrackingTemplate(adgrouptemplate);
  }
  } else{
    var TempCamp=TempSplit[Cn].split("=");
    while(adgroupIterator.hasNext())
  {
  var adgroup=adgroupIterator.next();
  Temp[1]=encodeURIC(adgroup.getName());
  TempCamp[1]=encodeURIC(adgroup.getCampaign().getName());
  TempSplit.splice(No,1,Temp.join("="));
  TempSplit.splice(Cn,1,TempCamp.join("="));
  var adgrouptemplate=TempSplit.join("&");
    adgroup.urls().setTrackingTemplate(adgrouptemplate);
  }
  }
} else {Logger.log("Enter at least one of the {CampaignName} or {AdGroupName}")}

}


function encodeURIC( r ) {
return r.replace(/\W+/g, "");
}
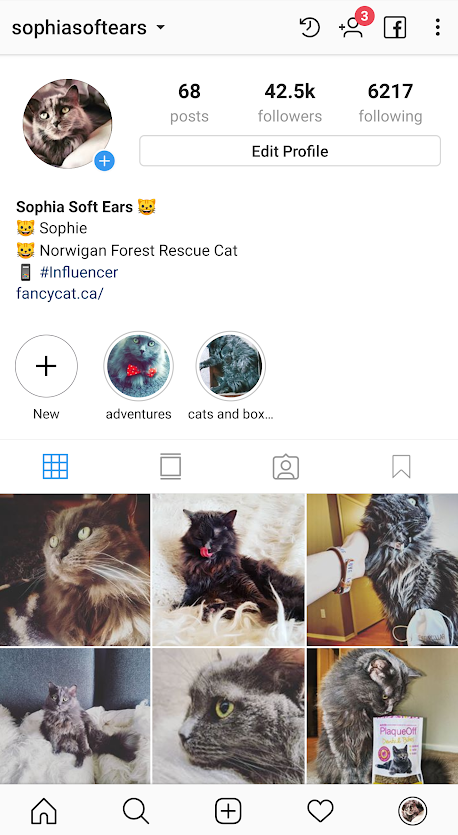
It has been over a year since my last post about our gorgeous cat Sophie’s Instagram Account. We have made great strides and she is now at 42.5K Followers with a great engagement rate.
Now the question that I ask myself, how can I monetize having this many followers? We have been trying to use her power as a social media influencer to do very selective sponsored posts and reviews of cat-related products. That is all good however you can only have so many cat products before you start looking like a crazy cat person. So we opened up our very own Cat Product Store called Fancy Cat. The goal by opening this store is to be able to use Sophies Instagram account to promote our own store.
I have always had a love for automation and “botting” it started in my early teens playing a game called Tibia. Tibia is a 2D MMORPG video game that my friends and I played all the way from grade 8 to grade 12. I say play but what I actually mean is it took over our lives. I would wake up 2 hours before I go to school just to get some “hunting” in on Tibia. So you can get a good understanding of the game that took over my life here is a quick video of me taking part of a quest in this game.
This game was extremely repetitive and I knew there had to be a better way. This is when I was introduced to botting, I started botting at this game and letting my computer level my character up and I love the satisfaction of coming home after school to see how many levels I had gained.
Transitioning to Generating Sales Leads Online
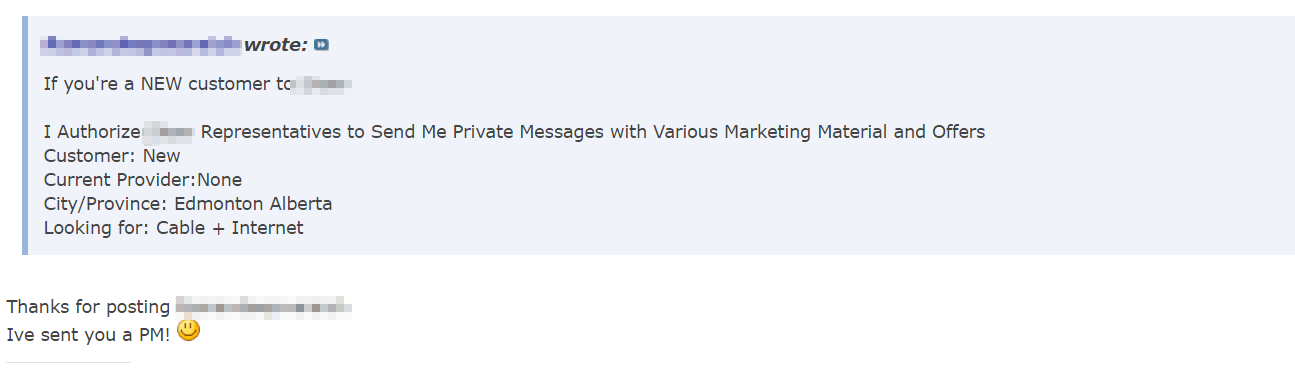
Let’s fast forward 5 years out of high school and I am working a door to door job while going to University for business and computer science. I always wanted to find out how to get more sales and more efficiently. So I did some searching online and ended up finding this online forum in which people who post when they had found “Hot Deals”. I found a section there that a couple of customers had posted their telecom deals on and I had begun messaging the customers letting them know what the current promotions were and that I could help them out directly. Sales started coming in and this was just the start.
6 months goes by and I had transitioned to knocking door to door 50% of the time and the other 50% I was working on the forums. By that time 4 other representatives in my same company from across the company were selling on the forums and now effectively my competition. I started bringing my laptop with me everywhere I went. As soon as I got an email notification on my phone that a new customer had posted I would start up the portable hotspot and boot up my laptop to send the customer a private message with the current offers.
Outsourcing the Bot Creation
This was getting ridiculous and I still wasn’t able to get to every customer before the other reps. This is when I knew there must be another way. I was part of this botting forum and saw the two program Ubot Studio and Win Automation coming up over and over. At this time I was being pretty cheap and didn’t want to fork out the $300 to purchase either of the software and met this guy from the Philipines named Ryan. I ended up paying Ryan $50 CAD to create me a bot to automatically respond to these customers that had posted with what my current offer was. This was awesome but just the start.
I used the bot Ryan had created for about a month until I was out of my home and I noticed the bot started spamming the forums I was on. I panicked and quickly deleted all my posts before anyone else had seen it. At this time I realized it was time, I create the bot myself to ensure this never happened again.
Learning to Create the Bot on my Own
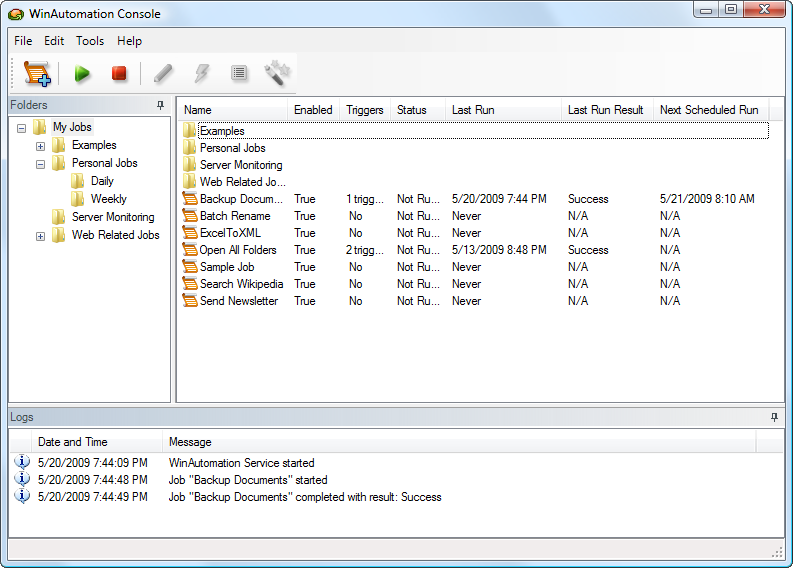
I first started by purchasing UBot Studio as this was the software Ryan had used initially to create me this bot. Ubot Studio was great however it wasn’t stable. The bot wouldn’t last a full 8 hours without having to be restarted. I started playing around with the WinAutomation trial and noticed I was able to get the bot running for 72 hours no problem with no crashes and knew I needed to make the switch.
How the Bot Was Programmed
After about a month of programming WinAutomation it was becoming pretty elaborate. First I was having customers respond in the following format
Customer: New
Current Provider:
City/Province:
Looking for: Cable + Internet + Phone
This allowed me to easily parse out which customers were new, what province they were in and what services they were looking for. My bot would first look to see if they are a new customer if this it true then we will proceed. Now we want to know what city they are in, and then we see what services they are looking for. With all this information the bot will look for the best deal for the customer. These deals were all in txt files sorted in their specific city name folder. These folders were in my DropBox which allowed me to change the promotion at any point.
At this time I was responding to the customers faster than the other reps and I had to continuously filter out my triggers to ensure the bot was accurately understanding what the customer was looking for. If the bot was ever confused it would screenshot the message and put it in a folder. Once a week I would go through this folder and tweak the bot to be able to understand more language.
Following Up With Customers
After the bot would send a private message it will wait 48 business hours and if it didn’t receive a response it would send the customer a message following up asking if they had any other questions and they wanted to sign up. At this time I realized I was getting customers from other cities sending me messages back saying they were helped by their “local rep”. At this time I knew I needed to make myself look local. I had changed my signature to include I was a
Closing More Sales by Making Myself Look “Local”
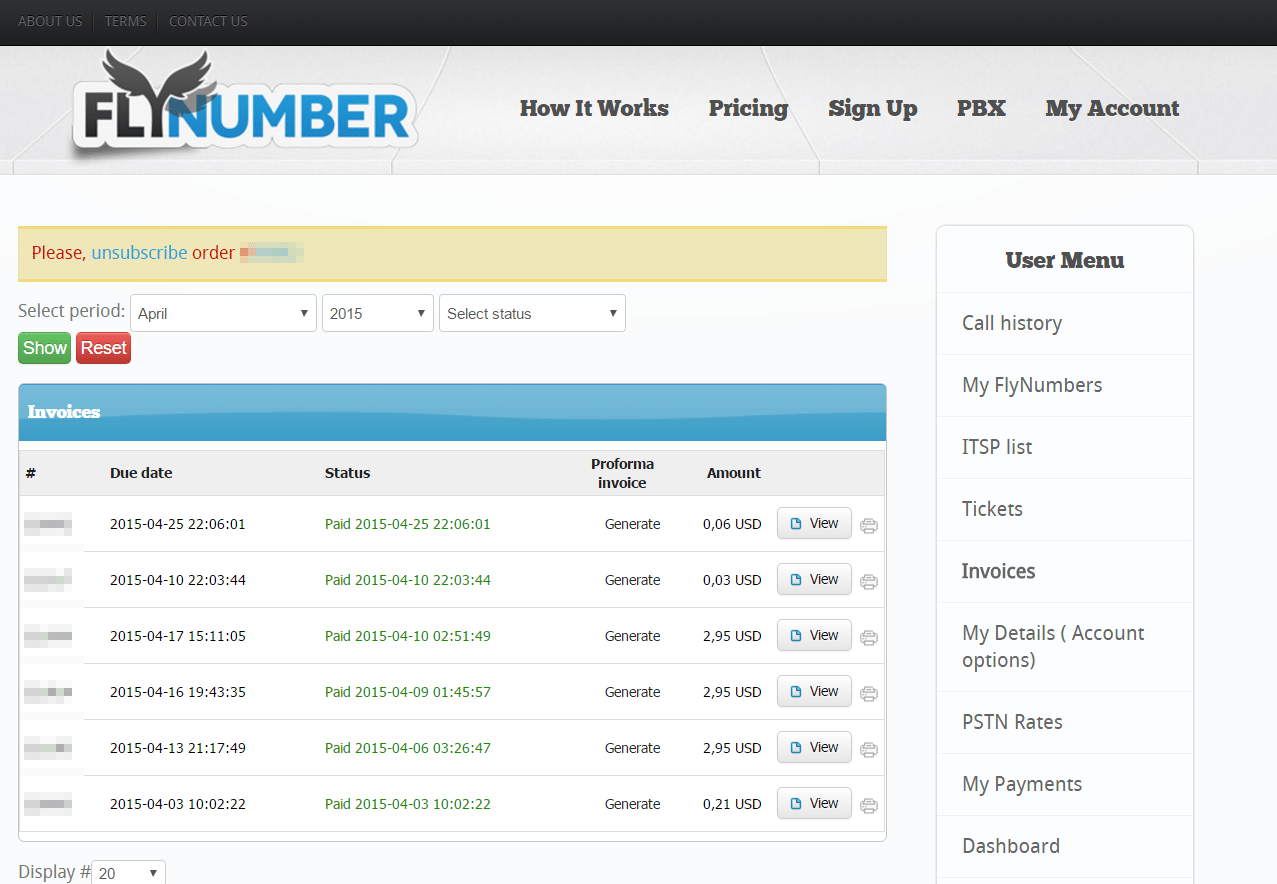
At this time I knew I needed to make myself look local. The first step was changing my signature to include I was a “National Sales Rep” the second step was I had purchased 4 phone numbers that for each of the provinces that I was selling in. These phone numbers would forward directly to my work phone. I found an awesome provide for these phone numbers for really cheap from FlyNumber.com. Now I modified my bot to identify the customer’s city and then once it scrapes the city it needs to identify what province that city is in and then uses the corresponding phone number in the footer of my message to make myself look “local”.
Top Of The Sales Board
My sales at this point were in the top 30% of my team the bot was tweaked a few times over the next two years. I ended up embedding a picture of my companies mascot on the bottom of the messages but this image was used more than just to spruce up my message. This picture was actually a PHP script that was stored a unique id for each customer that I was able to use to correlate the view with which private message it was. This script allowed me to identify when people that were actually current customers were just trying to fish me for what the current offers were and also allowed me to identify people trying to use multiple accounts to trick me. This code changes the image depending on that specific customer’s ISP when the customers deal I had sent them was expiring. You can find the code below (don’t judge on the code quality, it was a quick and dirty solution I had created)
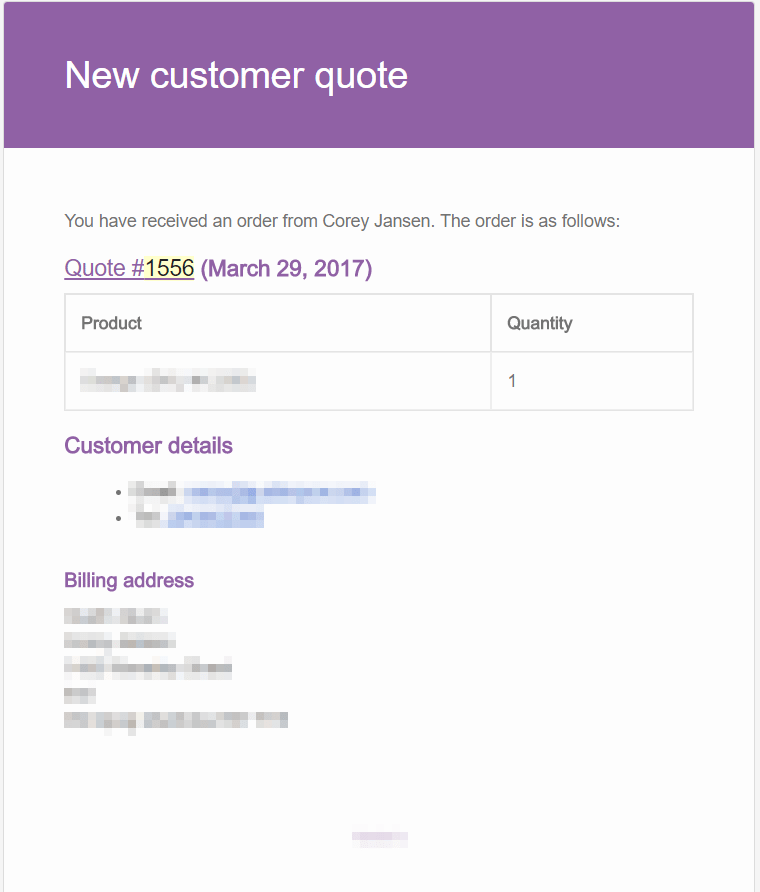
I have a customer who when they get an e-commerce order through their website built on WordPress using WooCommerce they want the admin new order notification to be emailed to the branch that is closest to them. There wasn’t any solution I could find for this so I created this script to allow me to define a different email address for order notifications based on the customer’s province. For Alberta and Saskatchewan, my client has two locations in each of those provinces so if the user is from Alberta and Saskatchewan the script tries to determine if the user is in the city where the branch is located and return that email address. If the customer is not in those cities the script will return that provinces default email address.
Installation:
Change the variables below to correlate with the states and/or provinces with defined email addresses between //EMAIL ADDRESSES FOR EACH PROVINCE/CITY DEFINED START and //EMAIL ADDRESSES FOR EACH PROVINCE/CITY DEFINED END
If you want to set specific city email addresses change variables under //IF USER PROVINCE IS SASKATCHEWAN DETERMINE IF CITY You can define these cities in the provinces variable
Copy this code to the bottom of your functions.php file in your Child Theme directory
<?
add_filter('woocommerce_email_recipient_new_order', 'diff_recipients_email_notifications', 10, 2);

function diff_recipients_email_notifications($recipient, $order)
{
    $provinces = array();
    //EMAIL ADDRESSES FOR EACH PROVINCE/CITY DEFINED START
    $provinces["alberta"] = "[email protected]";
    $provinces["calgary"] = "[email protected]";
    $provinces["edmonton"] = "[email protected]";
    $provinces["saskatchewan"] = "[email protected]";
    $provinces["regina"] = "[email protected]";
    $provinces["saskatoon"] = "[email protected]";
    $provinces["ontario"] = "[email protected]";
    $provinces["quebec"] = "[email protected]";
    $provinces["british columbia"] = "[email protected]";
    $provinces["manitoba"] = "[email protected]";

    $provinces["default"] = "[email protected]";
     //EMAIL ADDRESSES FOR EACH PROVINCE/CITY DEFINED END


    //IF USER PROVINCE IS SASKATCHEWAN DETERMINE IF CITY
    //IS REGINA OR SASKATOON IF NOT DEFAULT TO PROVINCE EMAIL ADDRESS
    $user_state = strtolower($order->shipping_state);
    if (empty($user_shipping_country)) $user_state = strtolower($order->billing_state);
    if ($user_state == "saskatchewan")
    {
        if (strtolower($order->shipping_city) == "regina" || strtolower($order->shipping_city) == "saskatoon")
        {
            $user_state = strtolower($order->shipping_city);
        }
    }
    //IF USER PROVINCE IS ALBERTA DETERMINE IF CITY
    //IS CALGARY OR EDMONTON IF NOT DEFAULT TO PROVINCE
    if ($user_state == "alberta")
    {
        if (strtolower($order->shipping_city) == "calgary" || strtolower($order->shipping_city) == "edmonton")
        {
            $user_state = strtolower($order->shipping_city);
        }
    }
    if (array_key_exists($user_state, $provinces))
    {
        $recipient = $provinces[$user_state];
    }
    else
    {
        $recipient = $provinces["default"];
    }
    //RETURN EMAIL ADDRESS
    return $recipient;
}